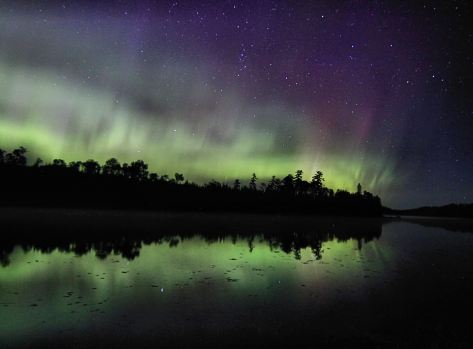
When you’re visiting Bearskin Lodge, you are almost as far north as you can go and still be in the US. You are also in one of the few remaining “dark skies” areas of the country, which means we have the lowest possible level of light pollution. Your chance of seeing astronomical events at Bearskin can be very good if you devote some time to looking up at the night skies.
Seeing the aurora borealis up here is a dream for many people, so it’s always a heart-breaker when guests discover that a magnificent display of lights occurred right over their cabin — but they never saw it. Here are a few hints for chasing the lights during your Bearskin visit.
What does the aurora look like?
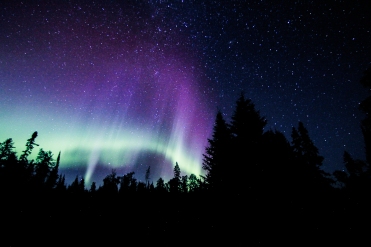
Think back to all those stunning photos you’ve seen of spectacular green, purple or even aqua northern lights, swirling overhead. Then erase that imagery, because that’s probably not what you’re going to see with the naked eye. Although the northern lights can contain a full spectrum of colors, our night vision color receptors do not pick up very many of the colors. The colors are there, just not so you can see all of them. It’s a lot like green grass – at night it’s still green, but it doesn’t look green to your eyes. (Thank you, Debbie Center, for that analogy.)
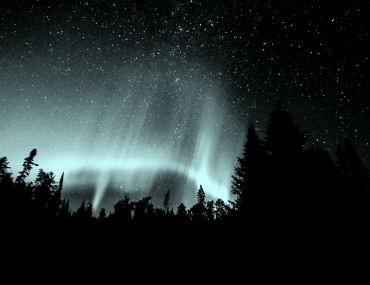
Unless you are seeing the aurora through a camera, which has many more sensitive color sensors at night than your eyes have, in far northeast Minnesota you are mostly going to see a white shimmering glow. If you’re one of the lucky ones with more sensitive color receptors in your eyes (or if it’s an exceptionally bright display), there may be rays and swirls of green, aqua, and purple, depending on the degree of darkness. If you have typical eyes, the aurora will look more like oddly moving white clouds in the sky – except that it’s dark, and you won’t normally see moving clouds then.
When should we look?
Once you realize that you’re not looking for a colorful neon light show, seeing the lights is simply a matter of knowing when and where to look. The aurora can show up at any time of year. There is no such thing as “northern lights season,” because lights are geomagnetic disturbances caused by storms on the sun. They have nothing to do with seasonal occurrences here on earth. Winter is sometimes advertised as “northern lights season,” but only because it’s darker for a longer time. You might not need to stay up quite so late to chase the lights in February.
It’s also easier to see the aurora when there isn’t a bright moon. A very dark night with clear skies and minimal moonlight is ideal for seeing northern lights.
There are many phone apps and computer web sites that can help you predict the best nights for great aurora viewing but they can’t forecast very far ahead, nor are they completely accurate. Predictions are a guess based on current sun activity. A common question we get is, “When should we come to Bearskin next (month/year/week) to see the aurora?” We truly have NO idea. Visit us when you are going to have a fabulous time anyway and then if the northern lights appear, it will just be one more unforgettable memory.
Where should we look?
This may seem obvious, but to see the northern lights you need to look north. That can be tough at Bearskin because our cabins are along the lake’s north shore. You need to get out on your dock, or out in a boat, or out on the lake ski trail in the winter, to be able to see a northern view. If the lights get going nicely, then there will be an arc of lights across the resort from the NW (staff housing direction) to the NE (the BWCA end of the lake). Occasionally the lights form an umbrella of light over the entire lake, but don’t expect that. It’s a rarity.
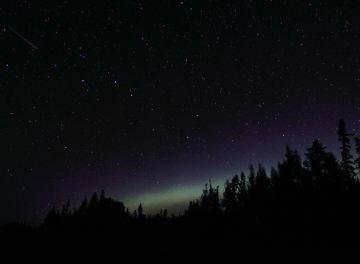
If you see an odd glow on the north horizon an hour or more after sunset, start hoping for lights. People often assume they are seeing the lights from a city (nope), or the dim last light from the sunset (nope, the sun never sets in the north). Then give yourself at least 10 minutes for your eyes to adjust; it takes time in the dark for your eyes to start to see the aurora. Bearskin sells headlamps that include a red light; these allow you to see outside without disturbing your night vision. Once you spot the lights, we promise you will be mesmerized. You might see pillars, arcs, curtains, pulsation, shooting rays, soft clouds, or even hear auroral noises.
Photographing the northern lights
If you wish to “see” the aurora through the lens of a camera, it will require a little pre-planning and a slightly better camera than a typical “point and shoot.” Your cell phone camera might work, especially if you can download one of the many apps that allow you to have more manual control over the phone camera settings. The best results are achieved with a DSLR camera, or a high quality “point and shoot” with advanced manual settings.
Camera settings:
- You need to be able set the ISO on your camera to a high number, probably 800 or considerably higher. The bigger the number, the more “noise” your pictures might have – but sometimes that’s a trade-off you make to get aurora photos with your camera.
- You will need to set the shutter speed on the camera, probably somewhere between 10 – 30 seconds, so it stays open quite a while. That’s how the camera gathers the colors. Experiment with increasing the shutter speed, until you see a picture that works. If you are shooting the lights with a simple camera or phone, maybe a setting for night photos will give you a longer exposure.
- Because the lens needs to stay open a long time, a tripod or support is essential. If you didn’t bring a tripod, find a way to set the camera on a firm surface. You can’t hold the camera still long enough to let in adequate light without assistance.
- The focus on your camera should be set to infinity, or whatever setting focuses very far away. If you can turn off automatic focusing, get rid of it.
- You will also need to look for the f-stop setting on your camera; it needs to be at the smallest number that your camera will permit. If you have lens choices, a wide angle lens captures more of the aurora, but it isn’t essential.
- Pressing the shutter sometimes wiggles the camera too much. A remote shutter control is ideal. (Amazon sells them for many cameras for around $7, not a big investment). A work-around is to take pictures with your camera’s timer. Many cameras have a 2-3 second delay option; most have a 10 second option, which seems interminable when you’re waiting for your camera to go off under the aurora. You have to work with what your own camera will do.
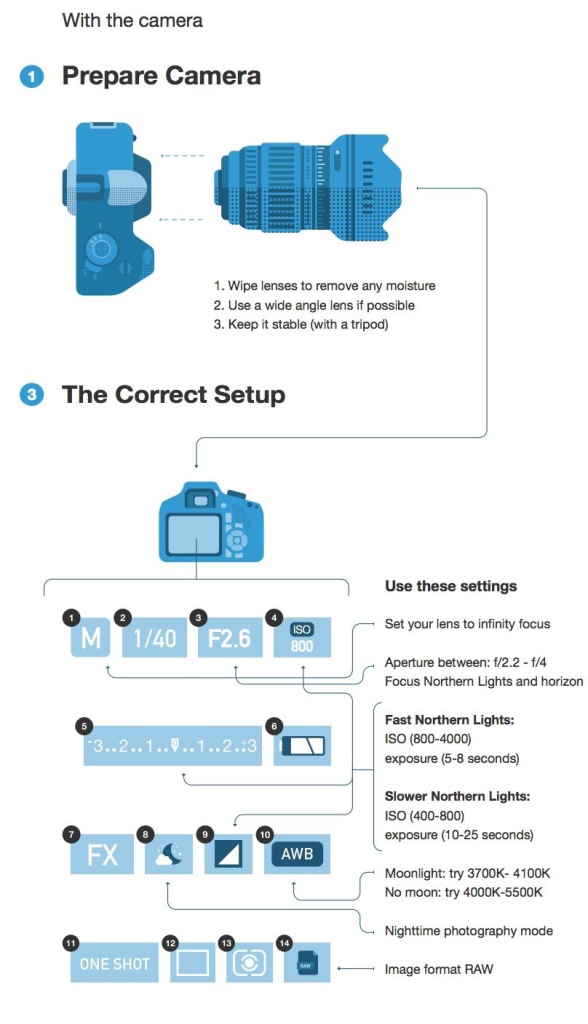
There are so many other camera settings that the experts use to photograph the lights, but these will get you started. If your camera has good “live view,” you may be able to watch the lights right in the back of the camera. Otherwise, just take dozens of photos, look at them, adjust as you go, and sooner or later you may see colors.
How can you bring out all the colors of the aurora in your pictures?
Almost all of the photos of the northern lights that you see online and in books have been put through an editing program to bring out more of the colors. Search “aurora post processing” for hundreds of articles on how to do this. Adobe Lightroom is the most popular, but any photo editing program will be fun for you to try. Even simple phone apps like Aviary will let you play with your pictures.
Many of the aurora photos that you see are art, not reality. I think the goal should be to make it look somewhat similar to what you saw that night, or at least reflect the real experience. Other photographers, though, enjoy bringing out as many stunning colors in photos as possible, often cranking up the colors so the lights look turquoise, yellow, magenta, and orange. If you look at northern lights photos often, you’ll eventually decide on a color range you like. The point is to experience the lights and then, if you get some photos, to extend your enjoyment of the experience by recreating your vision of the aurora, however simple or wild that may be!
Resources:
- Facebook group: Become a member of Great Lakes Aurora Hunters. All your questions will be answered there sooner or later. Wondering if the aurora is out? Just look at GLAH; if the lights are dancing, somebody on GLAH will say so. Every foolish or insightful question about photographing the lights has been asked on this Facebook site, often repeatedly. You can learn a great deal from this group. Check the section called “notes” on the page. It leads to countless useful articles.
- Do a web search of “photographing northern lights:” You will get dozens of informative articles about viewing the lights and photographing them.
- Space Weather Prediction Center: http://www.swpc.noaa.gov/ So much info here, but for the northern lights you want to click on the box at the lower right that shows the Ovation aurora model, which predicts auroral activity. If there’s any sign of that bright green or better yet, mutli-colored oval being close to the tip of Minnesota, there’s hope for lights. This section of the website shows a 3 day prediction: http://www.swpc.noaa.gov/products/aurora-3-day-forecast
- softservenews.com: Yes, it sounds like a website about ice cream, but for some reason it’s about the northern lights. This might not be the most reliable aurora predictor, but it certainly is the one of the easiest.
- Aurora Forecast/Geophysical institute: From Alaska, but fairly useful for us http://www.gi.alaska.edu/AuroraForecast/NorthAmerica/20160810
Useful Apps:
- Using an iPhone? “Northern Lights Photo Taker,” (they didn’t expend any energy coming up with a flashy name) is an app for iPhone that automatically adjusts your phone correctly for aurora pictures. It’s easily downloaded and works pretty well. You still need a tripod or stabilization.
- Forecasting the northern lights: There are many apps that will let you know when the lights are likely to appear. We use “My Aurora Forecast.” We really like this one, but there are others that are equally well-reviewed.
